
Let Slip the Bogs of War
A 4th Edition Beta Tournament

This past Saturday, I finally got the chance to take the Malifaux 4th Edition Beta rules for a real test drive. While I had played one game with Foundry to get a taste for the system, this was a full three-round event and there’s nothing quite like a full course meal to really appreciate the flavours of a new spice.
When the Returned keyword dropped during the last introduction of new content, I knew it was finally time to test out the Swampfiend crew that I have had sitting on my shelf for forever. With the rules for the Leech King and his Giant Leeches, I finally had enough flexibility to potentially build a few lists. Although - as I only had the model for Zoraida, Bog Witch - she would be my sole Master for the tournament.
I wasn’t alone in playing a monogamous tournament. As all of us were still fumbling, awkward fledglings with 4th Edition, everyone playing in Saturday’s event opted to bring only a single title for a single Master.
We’re going to save time on the preamble, because I want to bank my word count for dissecting my thoughts on the crews I got the chance to see and the current state of the game as a whole.
But - as usual:
Excitement = High
Malifaux Scene = Healthy
Caffeine = Yes
Round 1 vs. Yuri (Youko Hamasaki, Unseen)
Strat: Informants
Deployment: Flank
Starting Schemes: Assassinate; Reshape the Land; Public Demonstration
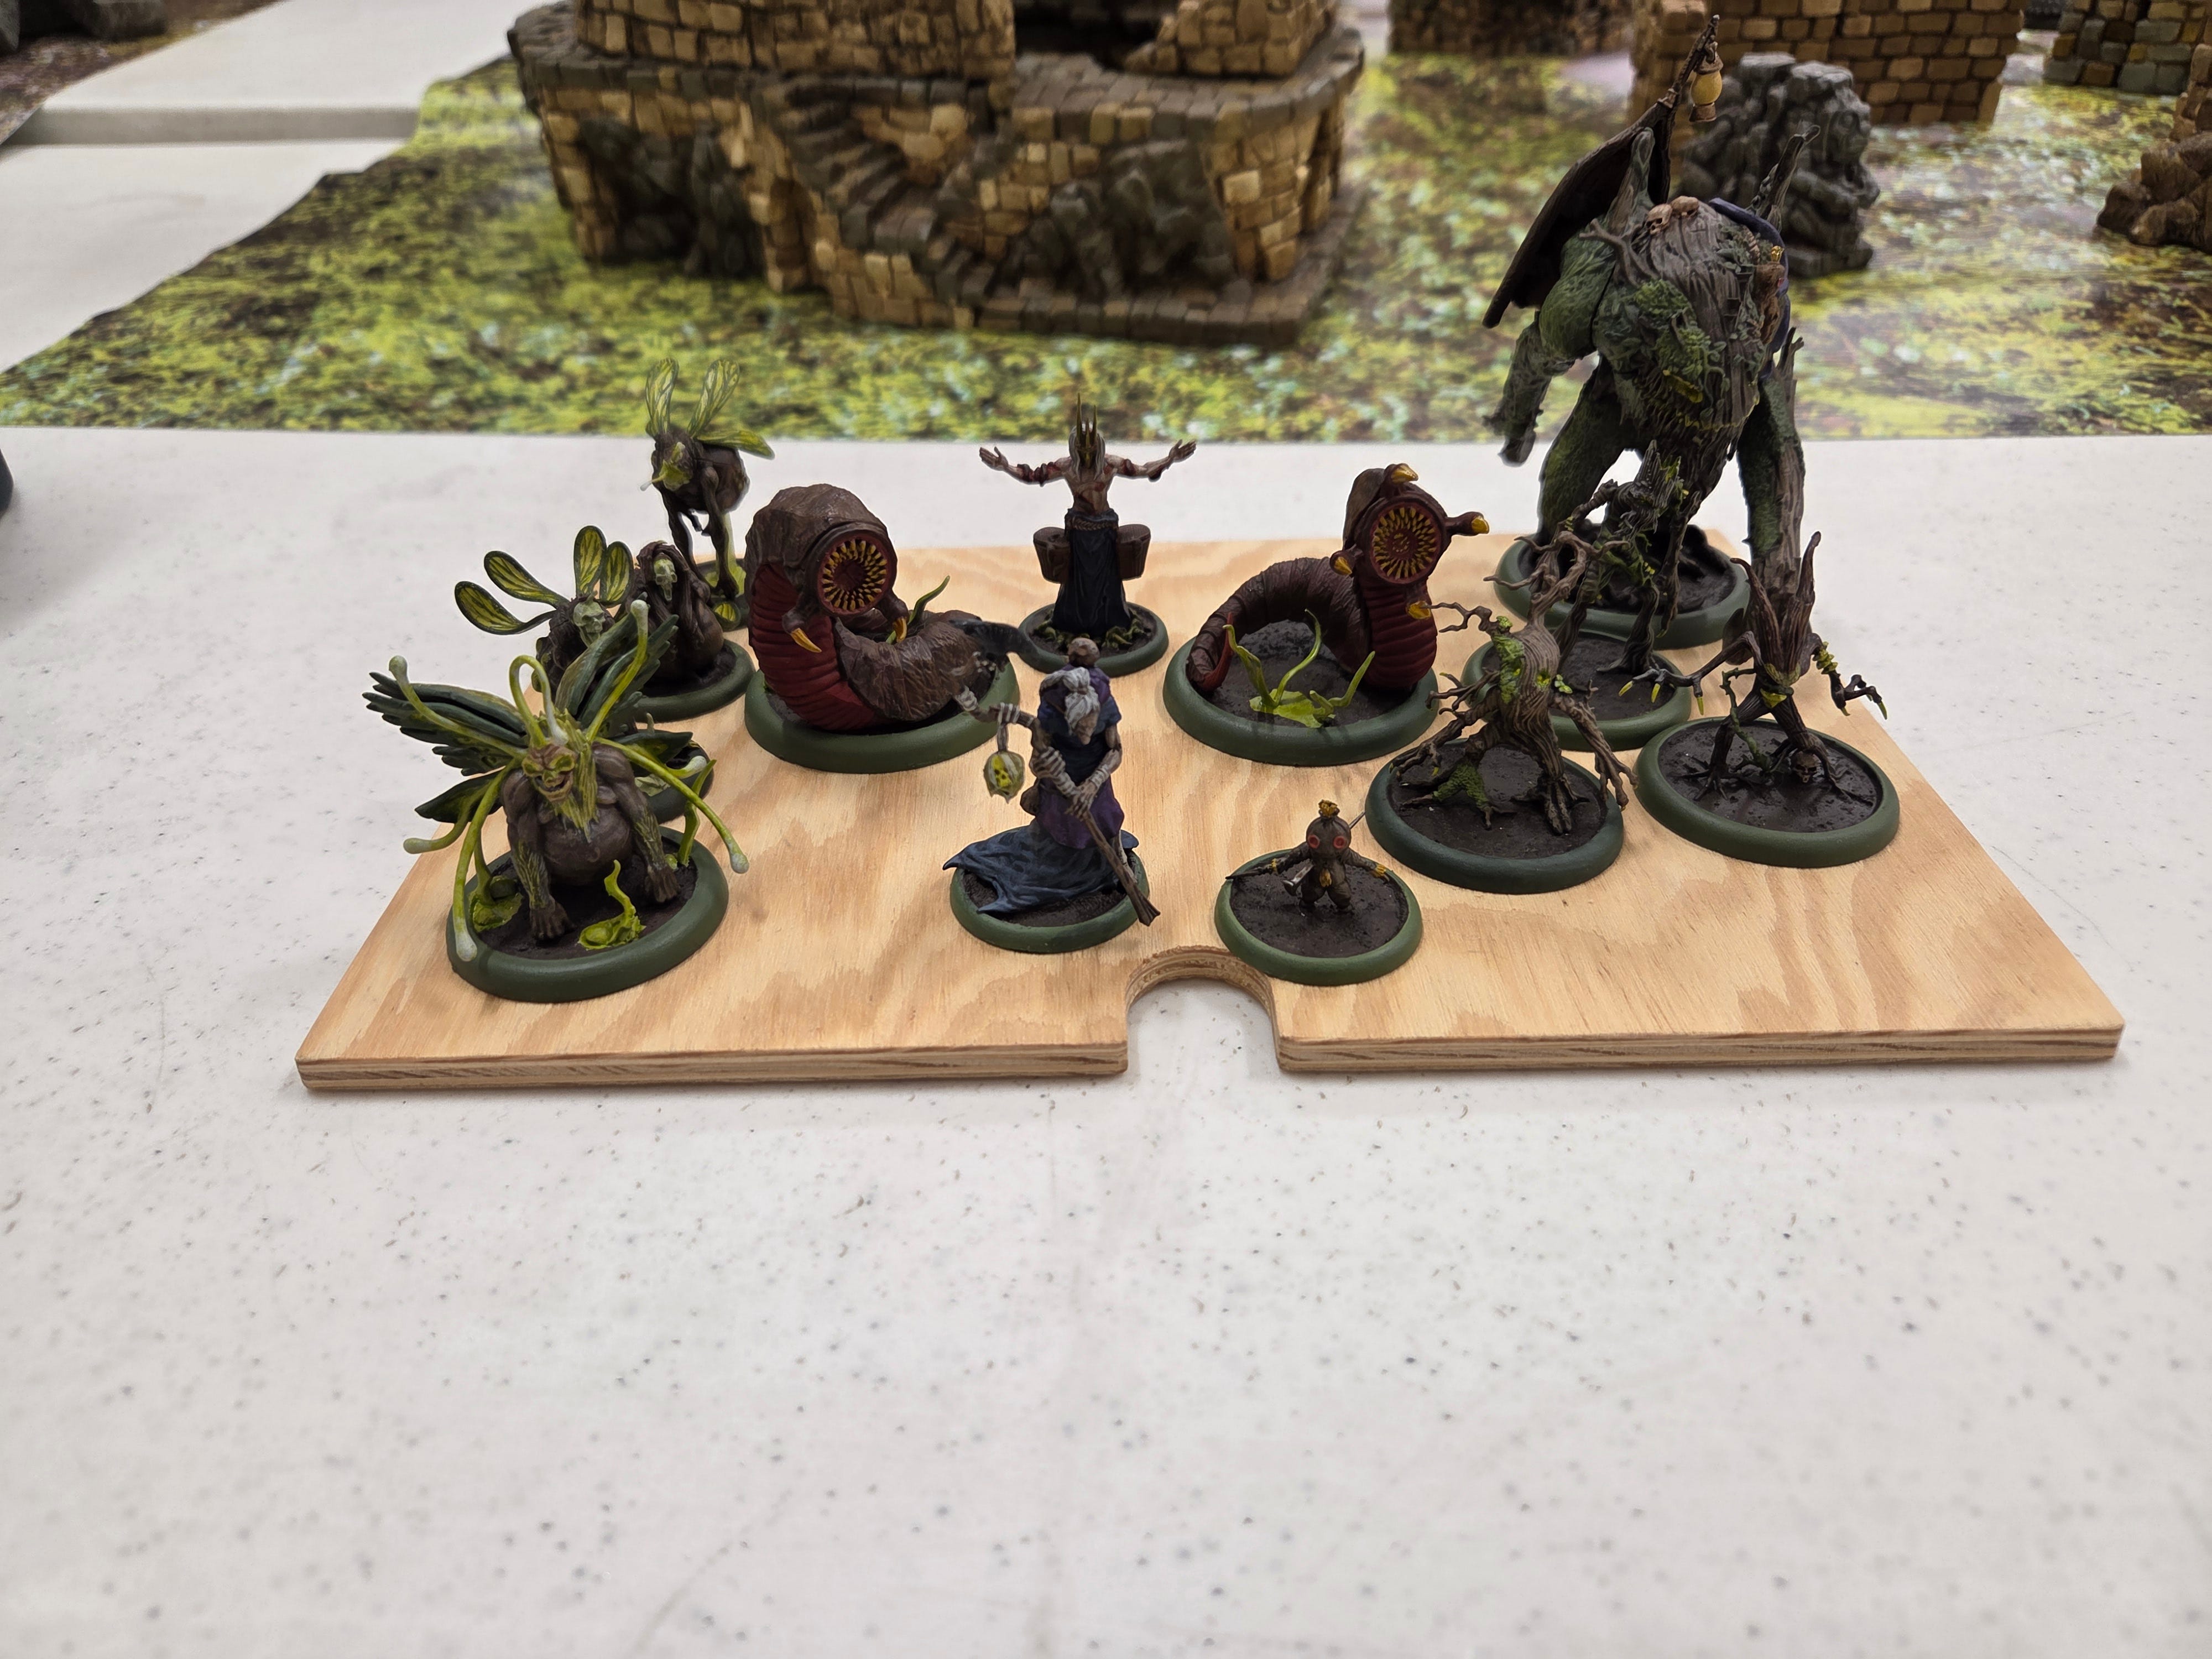
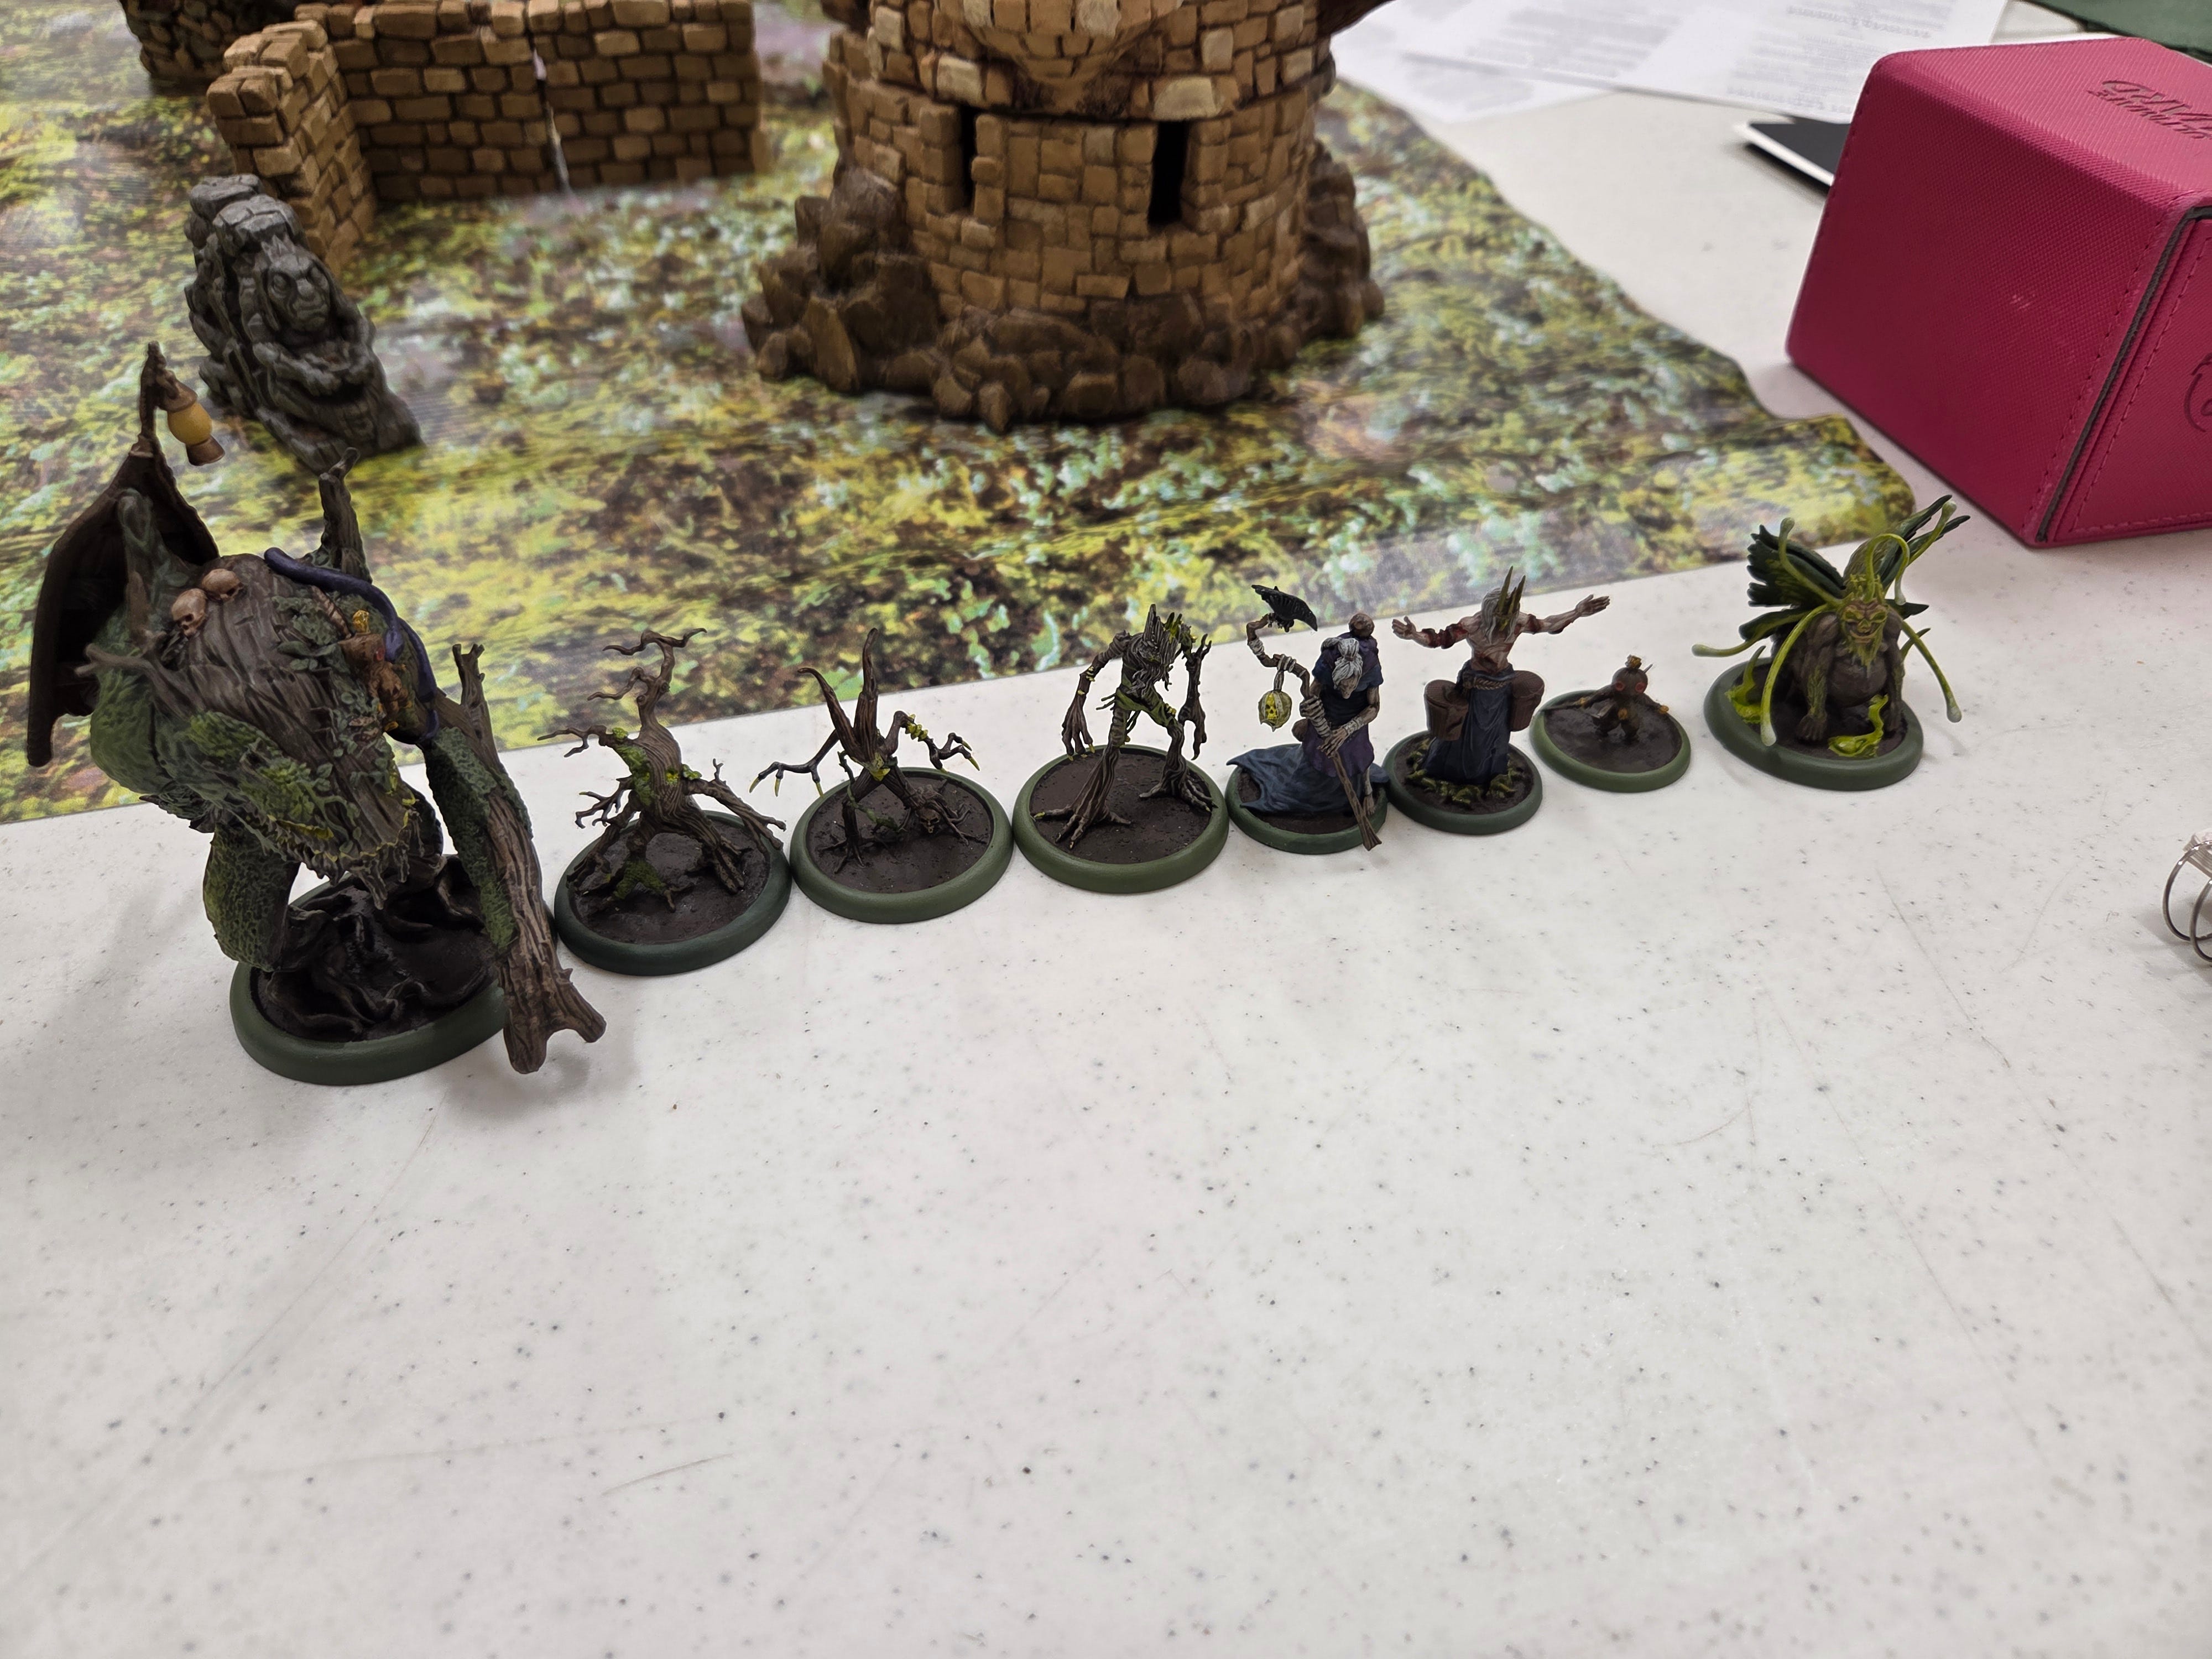
I didn’t really have much context for what might be powerful for Zoraida’s crew, so I built this list with an eye for maximizing my Soulstone pool and stuff that looked decent in a vacuum:
Zoraida, Bog Witch
Voodoo Doll
Bad Juju
Adze
Leech King
Waldgeist x3
+ 6 Soulstones
Armour 1 with 7 Move seemed like a good start for an Interacter, so I slammed as many Waldgeists as I could fit. I added this to a mix of some of the more iconic Swampfiend models that I actually own, with the goal of trying a few things out.
Yuri’s list was:
Youko Hamasaki, Unseen
Kunoichi x3
Courtesans x2
Charm Warder x1
Kabuki Warrior x2
Hinamatsu
+... I can’t remember how many Soulstones any of my opponents started with…
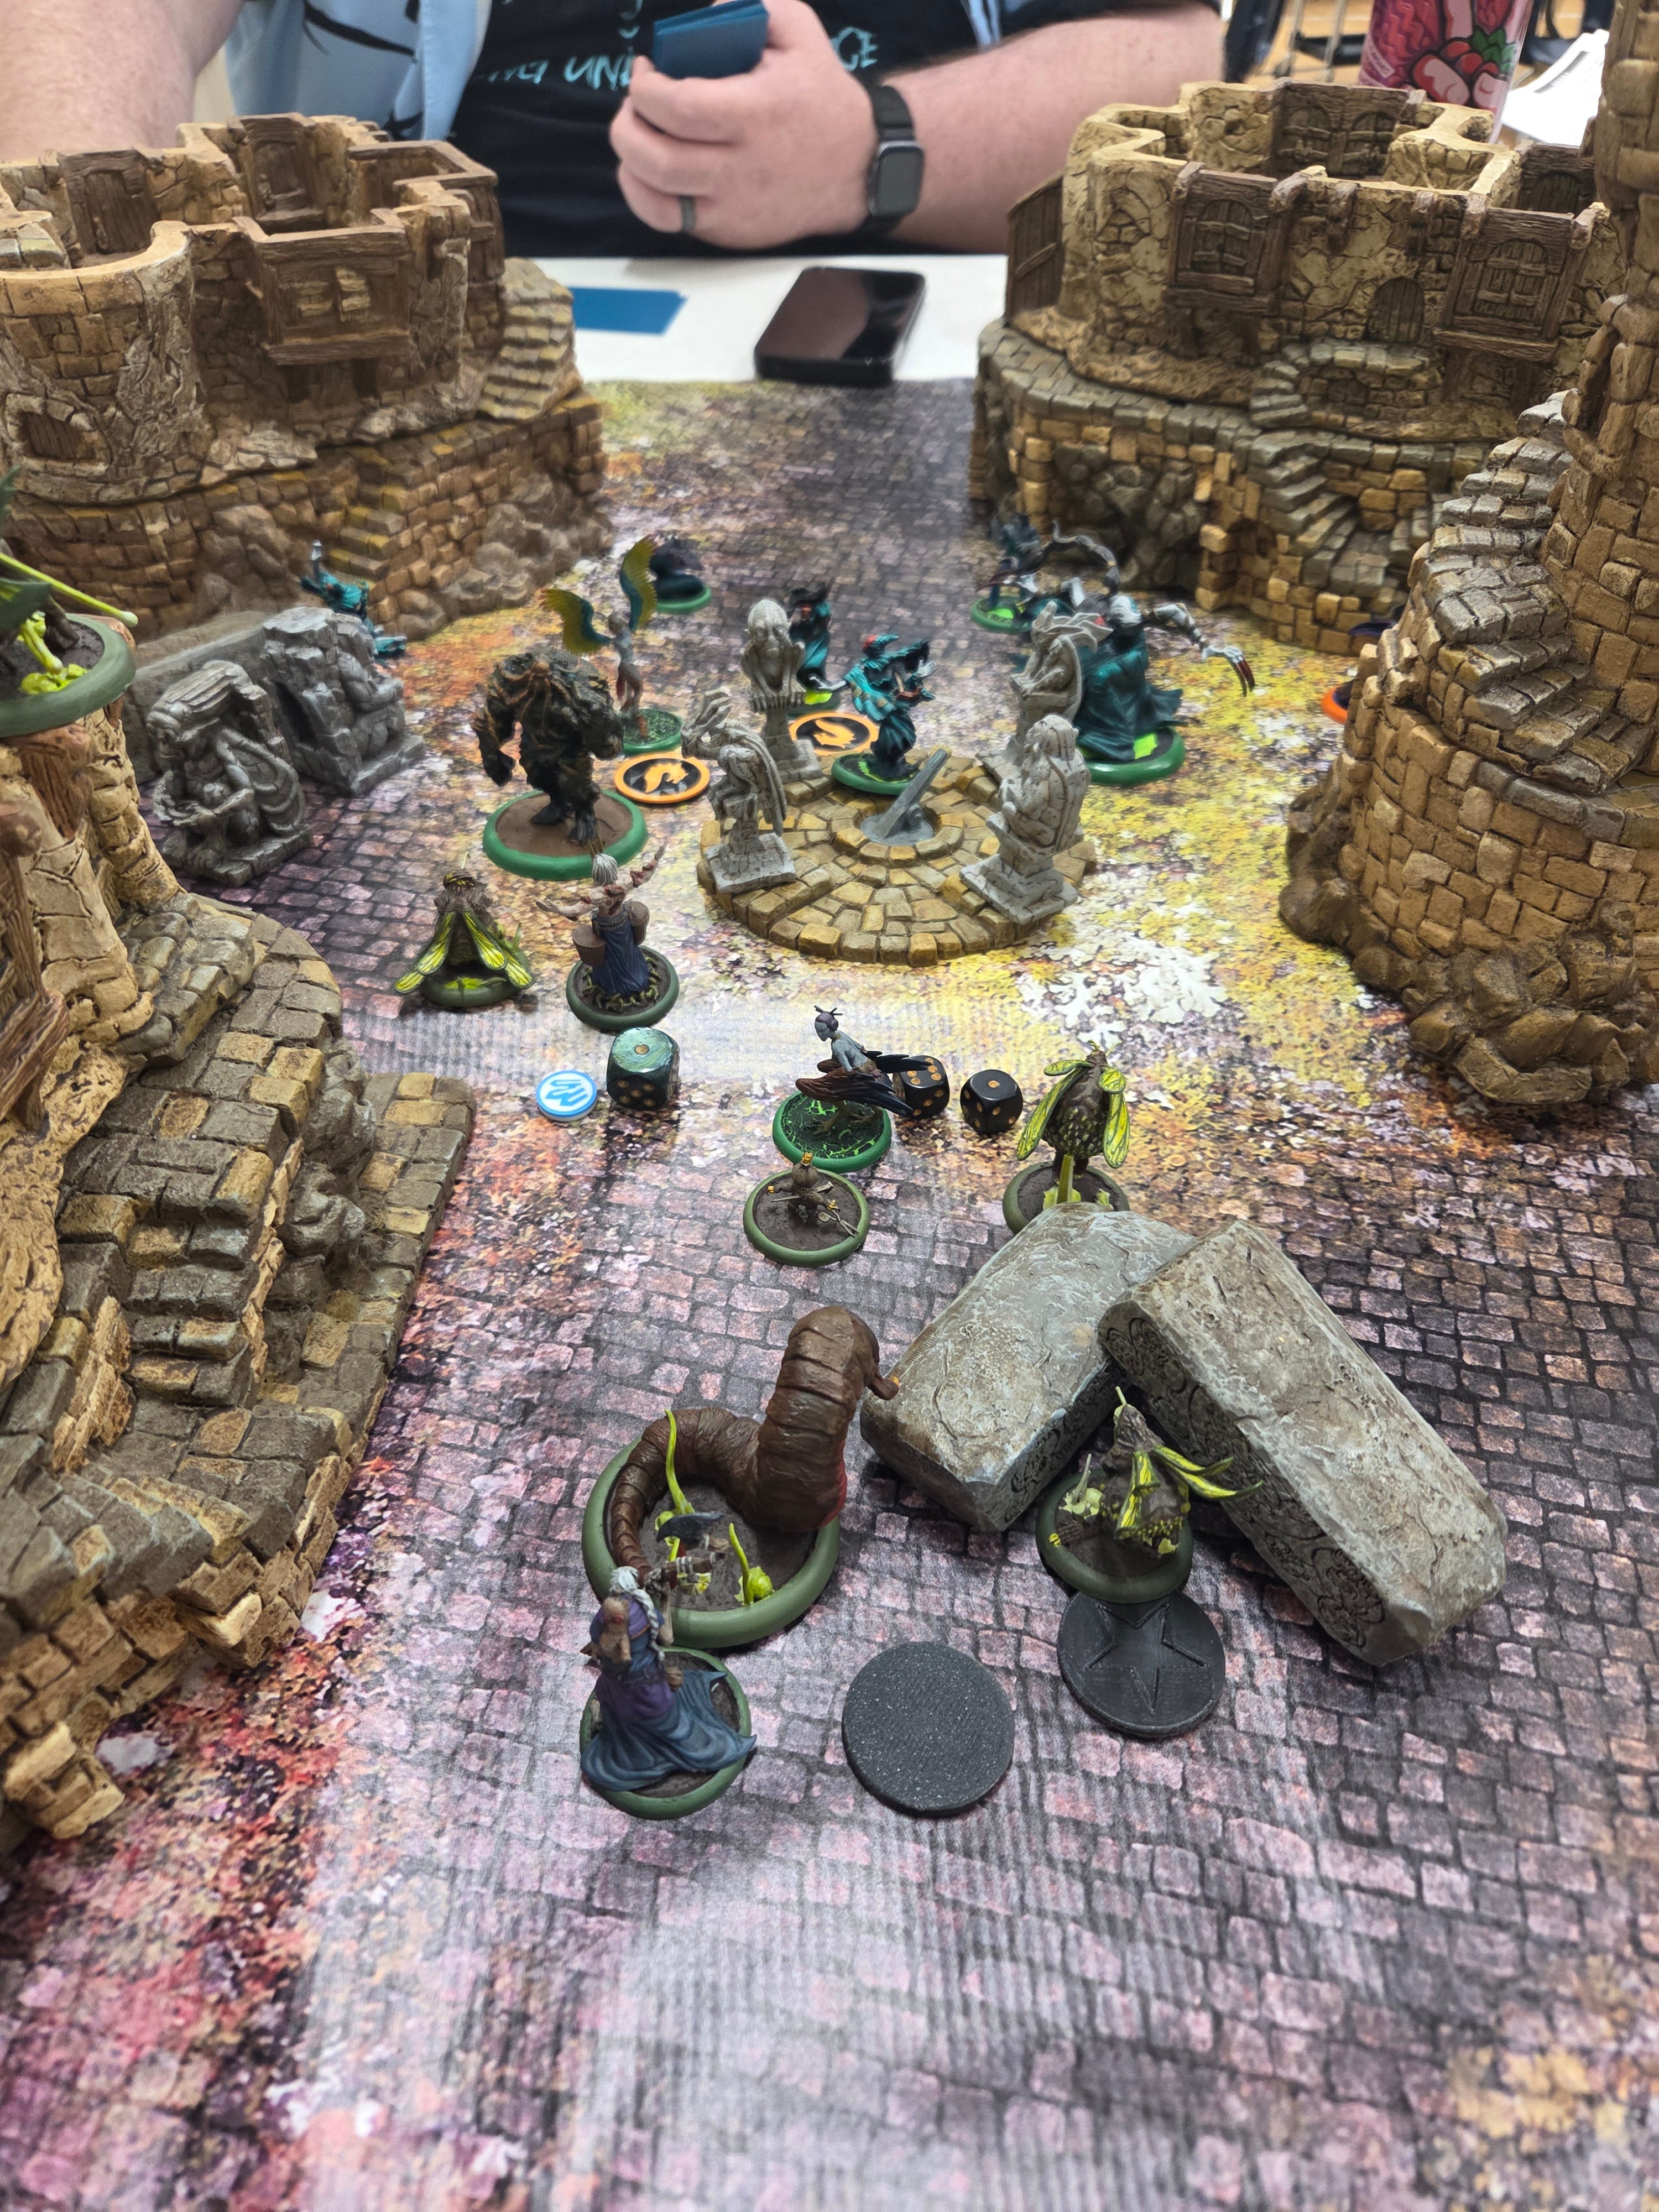
The map was host to some truly massive (and gorgeous!) terrain; all of it blocking; most of it climbable. I split my crew into three(ish) groups. Zoraida stayed back to babysit the Informant in my deployment zone with the Voodoo Doll and the Leech King lurking nearby; a pair of Waldgeists went after the Informant on my right flank; Bad Juju, the Adze, and the last Waldgeist made for the one on the left flank.

With Yuri bringing only two Unique models - one of them being his highly-mobile Master - I didn’t like the odds of scoring either Assassinate or Public Demonstration this early in the game, so I opted for Reshape the Land. Dropping scheme markers on the opposing table half seemed like it would be decently achievable with those Move 7 Waldgeists.
The game got off to an aggressive start, with most of the action concentrating quickly around the Informant on my left flank. Yuri used his Courtesans’ “Lure” effect to pull forward Hinamatsu and a Kabuki Warrior, while the Adze and Bad Juju made their own dash forward. The Adze used its newly buffed Lure effect to pull the Kabuki Warrior out of position (this new version of the Lure is strong), but I got greedy and left it exposed. Hinamatsu saw her opening and got into the weird beast. Thanks to some decent flips on my side, the Adze was able to survive the onslaught (wait - that’s not the right word anymore) at critical HP.
Meanwhile, Juju was able to engage (not Charge, thanks Disguised) the Courtesan keeping the left flank Informant company. Despite the overwhelming physical advantage, the tree monster was not able to apply fatal pressure and soon got harassed by an aggressive Kabuki Warrior who managed to dash in and spike damage for a big chunk of Juju’s health.
In the midboard, the Leech King tried to tie down Youko by summoning a Leech into base contact, but she was able to extract herself thanks to the Veiled Intentions trigger on Gather Intel. She dashed over to start harassing the two Waldgeists on my right flank who had secured that Informant.
Zoraida and the Voodoo Doll didn’t end up doing much this round, as neither of them were blessed with good flips - even with me remembering to filter using their Crawling Hex crew card. Thanks to the board presence provided by the Kunoichi, Yuri spent his last few activations setting up to double-score his scheme.
Turn 1 ended 3 for Youko (1 on Informants [Center and Home]); 2 on Public Demonstration) 1 for Zoraida (1 on Informants [Right Flank and Home])
I spent most of my early activations on Turn 2 breaking forward with everything I could to secure a 2-point Reshape the Land by dropping as many Scheme Markers as possible. While the Adze managed to pull itself out of immediate danger, Zoraida once again failed to successfully do anything - so she couldn’t draw Hinamatsu away and the killer puppet chased down the Adze to mop it up.
The Waldgeists on the right flank tried to harry Youko, but nothing connected and in response she dropped one of them. The Courtesan on the left-flank Informant weathered the attacks from Bad Juju, basically making the big tree waste his activation trying to pry her off of the Informant. The third Waldgeist finally managed to finish her off using both attacks of its own activation, only to have its efforts invalidated by the arrival of the Charm Warder and one of the Kunoichi - keeping that Informant perfectly contested.
When the dust settled on the end of Turn 2, Youko scored 3 (1 on Informants [Center, Home, Right Flank]; 2 on Detonate Charges) Zoraida scored 2 (Reshape the Land).
Because of this game’s tight back-and-forth, and both of us warming up for the day with our new rules and new minis, we had time called on us (rounds were 2.5 hours) and we had to end the game with Youko winning 6 - 3 at the bottom of Turn 2.
Thoughts on My Crew
I didn’t feel like I could make any informed judgement calls about my crew after this game. Between sloppy positioning on my part (RIP Adze - you were too beautiful for this world), some lackluster flips, and the truncated end of the game, it felt like I got a teaser trailer for Swampfiend. The Waldgeists were indeed very effective in their role as durable scheme runners, and while he mostly muddled around the midboard doing very little - I could see a world where the Leech King would be an interesting piece (the rest of the day will bear this out).
Thoughts on Youko Hamasaki, Unseen and Qi and Gong
Qi and Gong seem good, with Unseen maybe being a little too strong at the moment. Spoilers - but Yuri would go on to finish first in the tournament with a strong 3-0 (this in-and-of itself is not surprising, he is a fantastic player). We debriefed a bit during the event wrap-up and he let me know that he was able to score 2 for every scheme he chose throughout the day. Feeding this information into the mental playback of our game, I think I can point to one thing that needs to be tuned down in Qi and Gong, or rather, three things - the Kunoichi.
The idea of multi-model totems is very cool and I think it is definitely workable. However, right now the Kunoichi do too much:
First, they represent three bodies for scheming, securing Informants, or otherwise playing the Strategies and Schemes - and they are very good at this, with them being quite mobile and not overly-fragile.
Second, they each draw a card at the start of their activation, meaning that they provide even more resources to the Qi and Gong player (beyond the action economy provided by being three free bodies). This card draw is exacerbated by the fact that every card Qi and Gong draws is “live”. You have Empower on the low end, good cheats on the high end, and lots of middle-TN Tactical Actions for the rest. In fact, guaranteeing the Kunoichi’s very strong Tactical Action is the perfect use for a mid-value card they draw.
Third, Lookout is the icing on the cake. From my experience with this game, it didn’t seem like Qi and Gong are a super Soulstone-hungry crew, meaning that you always have to be on the lookout (ba-dum-tish) for where the Kunoichi are in order to not accidentally play yourself by attacking into the wrong model.
All of this is clearly meant to be offset by their relative fragility if caught in the open, and by Youko’s ability to kill them for a revive, but it’s not enough. Their fragility is undercut by their Tactical Action’s ability to place them out of combat (and if you are playing with the recommended amount of terrain, this is a reliable defensive measure), plus Youko’s strong base stats and halfway-decent health pool means that she probably doesn’t die frequently enough to reliably cull the Kunoichi.
I think something needs to be cut from the Kunoichi to make playing against Youko Hamasaki, Unseen feel more fair. As it stands, it’s too easy for the Qi and Gong player to effortlessly dominate through an abundance of cards and exceptionally mobile bodies.
Round 2 vs. Jay (Kirai, Envoy of the Court)
Strat: Recover Evidence
Deployment: Standard
Starting Schemes: Ensnare; Take the High Ground; Leave Your Mark
With Take the High Ground and its subsequent paths - and another table loaded with blocking, climbable, and high terrain - I opted to prioritize an abundance of Flight this time around:
Zoraida, Bog Witch
Voodoo Doll
Bad Juju
Leech King
Adze
Will-o-the-Wisp x3
Waldgeist
+ 3 Soulstones
Funnily enough, I wouldn’t end up taking Take the High Ground anyways, but I am glad that I unbenched the Wisps. It turns out Lured Into a Bog is a real glow-up for their “lure” effect.
Jay’s list:
Kirai, Envoy of the Court
Ikiryo
Oskar
Kuchisake-Onna
Lost Love
Enslaved Spirit x3
Shikome x2
I placed my opening Strategy marker on the far left flank, while Jay opted to place his right in the middle and up to the forward edge of my deployment zone. During deployment, I positioned most of my crew clustered around Jay’s strategy marker, with the exception of the Waldgeist, which I put immediately across from my own marker. After some consideration, I opted for Ensnare as my opening scheme, as I knew - based on historical precedent - Jay was going to try and get Oskar in my face as soon as possible.
Jay started by moving his whole group up and out, spreading wide and filling in the gaps with his summoned models. Thanks to his ability to summon at range, Jay was able to get a few Seishin into my lines to start spreading Spiritual Chains among my crew. He also sent his Shikome forward very aggressively, one to scheme and one to gum up my own mobility through engagement. Unluckily for the aggro Shikome, the only model it was able to reach was the Voodoo Doll, who responded to the aggression by placing its curse on the bird-lady and happily tying it up in combat. The plight of this Shikome only got worse when the Leech King introduced it to the synergy between his Bloodletting Signature Action and the Voodoo Doll, capping things off by summoning a Giant Leech next to the poor girl.
As predicted, Jay sent Oskar forward, but rather than shy away - I dragged him even further forward using one of the Will-o-the-Wisps. Both of us had saved our Masters until near the end of the turn. I was excited to see what Kirai could do. Unfortunately, what she appeared best at this round was flipping cards of value 5 or lower - including the Black Joker.
Meanwhile, I had done a careful job of setting up my crew as well-positioned “arc nodes” for Zoraida’s Eyes of the Night. I used her to “obey” three models, all mine: the Waldgeist, the Leech King, and one of the Will-o-the-Wisps. Thanks to this, I was able to use the Waldgeist (who double-moved to my Strategy marker) to scoop up a point on Recover Evidence and the Leech King and Will-o-the-Wisp to score a 1-point Ensnare on Oskar.
On his side of the table, Jay had misjudged some distances when dropping scheme markers and found himself unable to score Leave Your Mark - which he chose to discard in favour of a different scheme.
The score was 2-0 for me going into Turn 2.
I decided on Frame Job for the Waldgeist as my second scheme, planning on yeeting it into the melee that was developing in the centre of the board. Being useless to me now, I took advantage of the abundance of Will-o-the-Wisp Lured Into a Bogs I had to drag Oskar away from the action.
This ended up biting me a little bit, because it presented an opening for the Ikiryo to get into the Leech King. The big, spooky boi did a spectacular amount of damage - and burned two of my cards to stave off Execute triggers. In response, the Leech King double-tapped Blood Magic into the Ikiryo, healing back to a stable position thanks to the Drink Blood trigger and killing Kirai’s totem in the process.
Luckily for Jay, there were plenty more ghosts where that came from. Both of his Shikome used their free move to escape from combat and then dance around delivering Spiritual Chains and summoning Seishin. Kirai had moderately better luck this round, using Pour Out Your Hate to get a Gwishin on the board in contact with the Leech King - although she did manage to continue her spate of bad luck by flipping the Black Joker again when attempting her Signature Action.
The Adze was able to pull the Gwishin away from the beleaguered Leech King and into the path of my very valuable Waldgeist. In revenge, one of the Enslaved Spirits used its pseudo-Obey ability to force Bad Juju into charging the Adze - which luckily didn’t do much, but did put Juju out of a relevant position. Meanwhile, the Kuchisake-Onna added another Seishin and a Gaki to the fray near the Giant Leech. Wanting to get in on the summoning action, the Giant Leech summoned a friend and they killed the Gaki - which allowed the Voodoo Doll to scoop up a Strategy point for me before going for broke - putting the second copy of its curse on Kirai and charging right at her.
The round ended with Jay discarding his second scheme (Take the High Ground). I scored 1 from Frame Job (the Gwishin could not resist the delicious looking Waldgeist) and 1 from the Strategy.
The score was 4-0 for me going into Turn 3.
Turns 3 and 4 were a blur. Both Jay and I had the ability to manipulate the movement of the opposing crew, and we used this ability with abandon. Oskar finally got the chance to see some combat and devoted his time to pasting the Will-o-the–Wisps that had dogged him so severely during the first two turns.
Thanks to their mobility, the Shikome were able to get Jay on the board by scoring a two-point Ensnare during Turn 3. He was also able to get a single-point Frame Job on the Gwishin as a fun reversal.
Kirai’s streak of flipping the Black Joker continued unabated as she fled from the Voodoo Doll who - thanks to the damage pulse from the Leech King’s Bloodletting - was wearing her down faster than she could handle. On the last turn, the King got to pick up a double kill - as both Kirai and the hexed Shikome succumbed to the Doll’s curse.
Zoraida continued her reign as puppeteer supreme - using her Fateweaver’s Pull to set up a 2-point Public Demonstration for me in Turn 3 and making sure the coast was clear to pick up Strategy markers on both Turns 3 and 4.
In the end, the final score was 8-3 for me.
Thoughts on My Crew
This round, it felt like things really “clicked” for me. With careful positioning and making sure you keep within the all-important increments of 10” and line-of-sight for Zoraida, she can use Fateweaver’s Pull to set up a ton of the schemes in the current Beta pool. I have seen people talking about how the obey-centric approach she takes is detrimental because to successfully obey an opponent, you have to succeed on Pull and then whatever action you choose for the foe. But the ability to force a 2” push and then an Interact on a friendly that can relent? That’s so powerful when everyone’s engagement range is 1”.
The Adze and Will-o-the-Wisps feel much more powerful than they did in 3rd. Lure in the previous edition was potentially powerful, Lured into a Bog in this edition is always a massive disruption - to say nothing of getting the Foot in the Bog trigger on the Wisps’ version of the action. In my third game of this tourney, I was able to buy myself a ton of time against a terrifying Peacekeeper by forcing it into a corner and then putting the Bog marker between it and freedom - but we will talk more about that in a moment.
All-in-all, during this game I felt very “in control” and it was largely thanks to knowing that if I saved Zoraida for near the end of the round, I could probably do whatever I needed to do to score and not have to worry about anything getting in the way.
Thoughts on Kirai, Envoy of the Court and Urami
Recover Evidence feels rough for Urami. The low health on a lot of their models - especially things like Gaki - mean that even if they’re not getting Flicker’d like Dreamer, Insomniac’s summons - it’s usually trivial to mop them up and collect a Strategy marker. Jay gave up on competing on Strategy pretty quickly.
Overall, it felt like they had a ton of mobility and a lot of cool effects. I am very curious to see how they would do on a different Strategy and with a different initial Scheme Pool - and if Kirai didn’t flip the Black Joker during every single one of her activations.
Round 3 vs. Darrell (Charles Hoffman, Steel Sculptor)
Strat: Plant Explosives
Deployment: Wedge
Starting Schemes: Frame Job; Scout the Rooftops; Make it Look Like an Accident
This match’s map had a little bit more variety than the previous two. While there was still a ton of blocking/climbable terrain - there were also big chunks of Concealing and Severe. The middle of the board was dominated by a Height 4 gazebo with room to perch on top - this would be very relevant to how powerful the Adze was in this match.
For my list, I kinda’ split the difference between the previous two rounds. Going forward, I think this will be my “default” Swampfiend list for the models I currently own - unless their cards change dramatically as the Beta unfolds.
Zoraida, Bog Witch
Voodoo Doll
Bad Juju
Leech King
Adze
Waldgeist x 2
Will-o-the-Wisp x2
+ 2 Soulstones
Darrell’s list looked pretty scary from the other side of the table:
Charles Hoffman, Steel Sculptor
Mechanical Attendant
Clipper
Peacekeeper
Melissa KORE
Hunter x 1
Watcher x 3
I am going to forgo my relatively play-by-play approach during this Round’s retelling, because it would be a lot of repeating myself. I will summarize why by saying: the 4th Edition version of Plant Explosives slaps so hard. So much of what Darrell and I did in this game was jockey for points with movement effects, tight positioning, and Interacts.
I was able to secure an early advantage, getting some bombs on Darrell’s half of the table with my surprisingly speedy Waldgeists early and sneaking in a lead.
The Watchers did their best to try the same thing, but with their small health pools, they proved quite vulnerable to the Voodoo Doll’s curse and its synergy with the Leech King’s Bloodletting. I managed to scrap one of them before the turn was over.
It was 1-0 for me going into Turn 2.
Thanks to perching on top of the gazebo in the center, the Adze was able to send both Melissa and the Peacekeeper back into the heart of Darrell’s deployment zone with Lured Into a Bog. Melissa stuck around just long enough to trigger Frame Job on one of my Waldgeists.
Darrell was able to scoop a couple of my bombs, and drop some of his own, but it wasn’t enough to pull ahead and I was up 3-0 going into Turn 3.
Turn 3, Darrell was able to present a critical mass of bodies at the center of the table compared to my more spread out crew, and got himself on the scoreboard with a 2-point Leave Your Mark. This also meant that he had a tight little circle of safe bombing space, so we both got to score Explosives this round.
Zoraida once again proved the power of friendlies relenting on Fateweaver’s Pull, as the one model Darrell had left out of his centre cluster - the Hunter on my right flank - became the perfect fodder for a 2-point Public Demonstration.
The score was 6-3 for me going into the final turn.

We barely flipped an opposed duel once during Turn 4 as both of us scrambled to maximize our scores. Darrell was able to keep parity on Explosives and land 1 point for Reshape the Land. Meanwhile, I got my 1 Explosives point and a 2-point Harness the Leyline.
My hero of this Round was the Giant Leech I had summoned during Turn 3 to bog down Hoffman near the center. During its first round in combat with Darrell’s Master, it had flipped the Red Joker on defense to stand strong, and it did the same thing again this round - which likely prevented Hoffman from pasting it and letting Darrell score the second point on Reshape the Land - not that it meant much at this point, but I appreciated the gumption.
The final score was 9 - 5 for me.
Thoughts on My Crew
Lured Into a Bog was the all-star of this game. The Adze and Will-o-Wisps being able to send Darrell’s terrifying beaters an entire Walk action away meant that I bought myself the time to pull ahead on scoring early and set up things like the 2-point Public Demonstration on the Hunter without worrying about interference. It also allowed me to force Darrell to abandon his Bombs, which meant I could easily deny his ability to pull ahead.
This felt like a good match-up for me, as Willpower was not the strong suit on the other side of the table.
Thoughts on Charles Hoffman, Steel Sculptor and Augmented
This version of Hoffman seems super sweet. Against a crew that wants to play honest Malifaux, they feel like they would be super strong. Their ability to tank damage with Shielded tokens until they are ready to hit back with their super-powerful Spooled Up mechanic feels like a good level of power.
As I said, my crew wasn’t a great matchup for this approach to really shine - as I was rarely interested in actually fighting Darrell. He didn’t get Spooled Up until right before the last turn. I would love to rematch Darrell with a more punchy crew and see what it feels like to play the game on the terms that Hoffman wants to play it.
Tournament End
My 2-1 finish was strong enough to earn me third place overall - with Misaki, Obayun taking second and Yuri’s Youko Hamasaki, Unseen taking first. For many players, this was their first chance to try 4th edition - and the overall impressions seemed positive.
But, let’s get into more detail - we’re still in the Beta, and folks want to know what’s working and what isn’t:
The Beta Lowdown
The efforts to shorten the games are working. Both my Round 2 and 3 games finished ahead of the 2.5 hour cutoff - with Round 2 ending within only 2 hours. This takes the cake for fastest game of Malifaux I have ever played. Over the course of 3rd Edition, I think I played in around a dozen tournaments, and over the course of that run, maybe 1/3 games ended within “time”.
While some of this is definitely down to immediate scoring and only 4 turns, playing three rounds with the same crew consecutively meant that the reduced amount of complexity per-model finally started to have an effect. By the end of Round 3, the basic numbers on a lot of my abilities had been imprinted into my brain. I didn’t need to consult a given model’s card to remind myself of the specifics of an ability every time I used it - this was never something I could do in 3rd - despite playing dozens of games of that edition with only 2-3 different crews.
There is an argument to be made that this might lead to gameplay becoming stale on a long enough timeline, but my counter to that would be that between two Titles for each Master - both with unique Totems and Crew Cards; and with Strategy, Deployment, and Scheme Pool having such a dramatic impact on any given match-up, there is plenty of granularity within the rules to keep things fresh for each game.
I know that I have seen a lot of “killing models is the most effective strategy” on the forums - but my own experience doesn’t bear this out. If I had tried to go all-in on denying my opponents AP through violence, I would have gone 0-3. I did not feel like I was on the back foot at all for choosing a more calculated, non-violent approach.
The crews I played against seemed like they had some really cool stuff on the other side of the table. Qi and Gong feel like they’re in a good place - even if Youko Hamasaki, Unseen might need a bit of a downtune. Kirai has a lot going on, and our match felt a bit skewed by the repeated appearance of the Black Joker during Kirai’s activations, so I am not comfortable speaking on them yet. Hoffman felt perfect, I love painting robots and I am seriously considering investing in an Augmented crew now.
I love the new incarnation of Plant Explosives. It feels dynamic, fast-paced, and extremely competitive. On the other end, I want to like Recover Evidence. It encourages interaction with the opposing crew, and lets you bash plastic with your opponent - but both times I have played it, it’s felt a little buggy. The stipulation that the models only drop Strat markers if killed by an opponent is a step in the right direction, but it doesn’t help for things like Gaki which functionally have a Flicker token by virtue of dying to a light breeze. It feels like there is a workable, fun Strategy buried in here, but it still needs some workshopping.
This diatribe has already gone on long enough - so I will parcel out my Swampfiend- specific feedback in a follow-up post (I have thoughts). Overall, the event was a blast. Even with a system that’s still rough-around-the-edges, it’s never a bad time to spend a day playing toy soldiers with friends. I remain cautiously optimistic about 4th Edition. No matter how skeptical I try to make myself - when the rubber meets the road, the game remains fun, complex, and undeniably Malifaux.